Wednesday 17 July 2019

Beauty is In the Details: Kitchen Remodel Continues


We are now 7.5 weeks into the kitchen renovation project and the details and layers have started getting installed.   This is the fun part where the vision starts to really come together.


This week there were some monumental updates that were added to the kitchen; the hardware, countertops and lighting!  

The white quart countertops went In around the perimeter of the kitchen.  If you recall, there was black granite there previously so this makes for a much brighter work space.  


The brass gold hardware was installed onto all of the cabinets and drawers.  


Even our faucet is brass gold (Newport Brass Faucets).  


The most exciting development for me personally was the unveiling of the solid walnut block for the island.  It's double the standard width so it will make even more of an impact.  And it looks fabulous on top of the navy island!


You will recall, below is the original kitchen.


The entire pantry closet was removed and a hutch cabinet was built with more of a presence.
Here is BEFORE:


And now after, In progress:


Lastly, the pendant lights were hung In brass gold, the blossom pendant from Worlds Away.  I think they are unique and also tie In well with the other elements of the kitchen.


 Additional details will be layered into the kitchen as the week goes on.  Next week, the backsplash is scheduled.  Also, the counter stools have been ordered!  Stay tuned for a sneak peek on those.

xo
Heather


Wednesday 3 July 2019

Kitchen Renovation Midway

It's way past due for an update on the kitchen renovation.  Those of ya'll that follow along on instagram are used to seeing daily updates, but let's catch everyone else up to the progress, too.

(If you're new to following this project, you can catch up here: )
Let's Redo!   |   Renovation Goals  |  Renovation Selections  |  Kitchen Stools  |  Kitchen Progress 

We are about 5 or 6 weeks into the project at this point the structure of the custom cabinets is In place.  I selected Ultra Craft Urban Gray cabinets for the surrounding kitchen area.  They don't appear to be gray In this lighting but once the back splash is added there will be more contrast.


The appliances are In place, but currently only the fridge and the oven are hooked up.  This has given me several weeks of the valid excuse not to cook anything for dinner...


I am loving the navy island.  We have a fast cook oven and a microwave that will be hidden In here.  This photo makes the blue appear a bit brighter than it is In person.  I can't wait to see the walnut butcher block top for the island.  It's 1.5 times the standard thickness so it will make a hefty statement.


The hood is now In place.  I wanted stylish but subtle.  The kitchen width isn't long enough to have a larger range and so having an overly pronounced hood wasn't In the equation either.  


This really is a labor of love project.  Many may assume that the cabinets come already assembled from the factory, but for a true custom renovation, the cabinets are templated and custom built into the space.  This is more time consuming but the results are definitely distinguishable In quality.

These renovations seem to snowball additional projects (reference the interior door).
Along the way, I noticed that my floors were really beat up and In need of some attention.  Graciously, my contractor arranged for a floor guy to step In and buff the floors on the first level to include the kitchen, family room and sunroom.   This meant that all furniture had to be moved out of this area for 2 days!   No problem!


 We had plenty of space In the study and foyer for the excess furniture.  (ha)


It was well worth the results.  It's nice to have newly updated floors to match the new kitchen.  


Next up, we'll be starting to add some of the details into the kitchen.  Today, I selected hardware and lighting.  Stay tuned for the next post where I'll review these selections.  Thanks for following along In this journey and please follow me on instagram if you'd like daily sneaks!  


Heather

Monday 10 June 2019

Painting Interior of Front Door


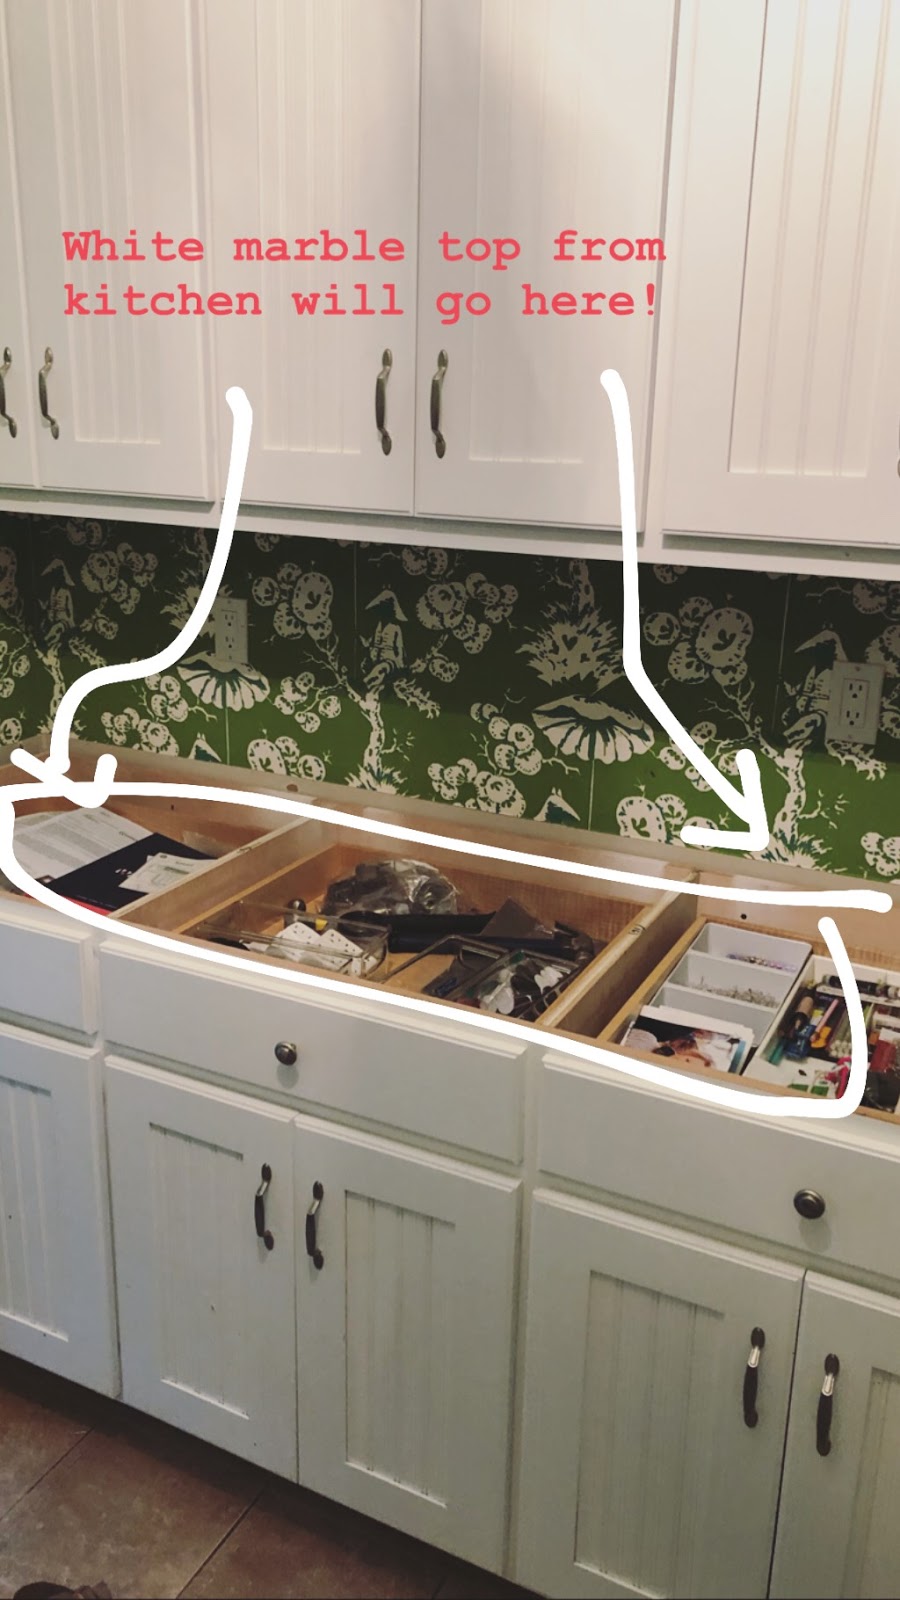
My creative juices seem to flow In spurts.  Once I start a project and see design progress, it completely invigorates me to keep going.  As ya'll know, I'm embarking on a complete kitchen remodel right now.  The crew is at the house daily and I'm seeing fun and exciting enhancements to my space.

This has my wheels turning for other areas of the house I can update with minimal expense and effort.  For a long while, I have brainstormed the idea of painting the interior side of my front door.  I love the look and I think it adds a fun design element.


Here is the current interior front door space.  I decided to photo shop different areas of the door to get a visual of how the finished project will look.


Initially, I went conservatively and colored only the back of the door itself.  With so much molding around the perimeter, I felt that having only the door painted will be underwhelming.


I extended the color to the side panels (very similar to the inspirational photos I pulled above).  This seemed to make more of a presence.


And just to conclude the experiment, I added color to the top sky window.  Hmmm....I went back and forth because I think it could work, but In the end, I selected the middle selection where the color will be on the door and side panels but not the top molding area.  


I have a lot of teals In the dining room, study and living room.  I wanted a dark color that could represent a bluish tone, but I also wanted to tie In the color hues In the rest of my rooms.  I selected Benjamin Moore Slate Tac 2058-30.  


It took a few coats In high gloss and the door was looking transformed.  I have contemplated continuing up to the transom window area but for now, I'm going to live with it the way it is and see how I feel.  Not visible from these photos is a white trim that goes around the perimeter of this room (therefore I feel the white trim at the door still works to tie everything In).  Additionally, the study to the right of this space is also painted In a variation of teal so this color is carried through In several other rooms In the house.  


Vivid Hue Home  

I posted this reveal on instagram and many of you went crazy over the rainbow grosgrain chair.  It's Dransfield & Ross Louis XV and I can't find a current link for the chair.   I purchased it several years ago knowing that I would always love it and that rings true.  


Have you ever painted the back of an interior door In your house?  If so, what color did you select?  

Next week, back to our kitchen renovation updates!  


Thursday 6 June 2019

VHH Renovation: This Week's Review In Photos

The Kitchen remodel is well underway.  Last week, we started off strongly with a complete demolition of everything in the kitchen.  Now, they are diligently working behind the scenes with changes such as electrical rewiring, plumbing adjustments and inspection approvals.

(If you're new to following this project, you can catch up here: )
Let's Redo!   |   Renovation Goals  |  Renovation Selections  |  Kitchen Stools 

There aren't as many dramatic photos to share during this phase so I thought I'd take you down a stroll of what's happened so far.


The project started last week with me frantically removing all aspects of the kitchen from all counters, shelves and drawers.  This was a good opportunity to purge many things we no longer needed but, gosh, there were things that literally seemed to come out of the woodwork.   Mission accomplished.


Now, the reality is that all of the junk that was In my cabinets had to go *somewhere* and while I tried to throw as much away (or donate) where possible, there were still piles and piles of things that got relocated to my dining room and mudroom.


I'm using a Connecticut team from Showcase Kitchens and they have been an absolute pleasure to work with.  Very professional and very buttoned up.  On day one, I left my kitchen looking like this:


And returned with all cabinets and appliances (except fridge) completely extracted from the kitchen.


 Shortly thereafter, the food pantry closet disappeared and I was more than happy to see this.  I'm not really sure why this closet bothered me so much but In the weeks leading up to this project, I could no longer look at it without cringing, ha!  It's likely due to the fact that the door stopper at the top of the pantry came off so the doors would push inside the pantry way past the door well.  It was a constant reminder of the ways the kitchen was falling apart.


By week's end, the marble slab on the island was removed...off to get cut and resized for my mudroom counter.   (Currently the mudroom has black granite and it's always bothered me because it doesn't match the Meg Braff kelly green wallpaper installed there).  


Next, the entire walnut kitchen island was removed (it will be replaced with the navy blue island).  And the silver pendant lights were taken down (stay tuned for what I have In store for lighting).  


The rest of this week will be mostly uneventful for photos.  The crew is working around the clock with plumbing and structural adjustments.  The inspectors will need to come approve the work completed to date.  I'm hopeful that by next week, the beginning parts of the cabinets will start to come back into the kitchen.  (And always, I'll continue to post snippets In real time on instagram stories, so make sure to follow here).  


Related Posts Plugin for WordPress, Blogger...