Showing posts with label DIY. Show all posts

Sunday, 30 May 2021

Vivid Hue's Personal Closet Makeover

 I often post photos of my house on social media.  When I share my bedroom photos people inevitably ask to see the closet, too.  We'll y'all will soon see why I've never showed pictures from inside my closet.  Until recently, it was a dark hidden secret (aka disaster zone) that I purposefully kept behind closed doors!  

I do believe that an organized and well thought out space can provide mental clarity.  You can only imagine what this space was doing for my mental acuity!   I have no idea how I found clothes to get dressed In the morning.  Without further adieu, let's just jump right into this.  


Disaster Zone In Vivid Hue Home's Closet "Before" 


This huge mess started during Covid when one season changed to the next and rather than swapping my closet out for the seasons, I just added the new season right on top of the old.  One sloppily folded sweater after the other and eventually I had built quite the empire for messy closets.  There was no way I could get my head around tackling this mess on my own.  

Enter Megan Guest, from A Tidy Guest.  Tidying and organization is In her DNA and I met her when she came into my shop and became a fabulous customer.  I made an appointment for Megan to come to my home and take a look at the "project."  Within five minutes of consultation I knew she'd be the guru for my mess, er...job.  Eager to get this party started, I asked when she could start.  Much to my delight, she had a few hours right that afternoon to jump right In.  We worked together and Megan would hold up each item In front of me and we would sort into piles of "keep" or "donate."  Megan was gentle but firm In questioning my hold on certain items ("this sweater is filled with holes", "I don't think these stains will come out:).  

Meg from "A Tidy Guest" literally on hands and knees sorting my closet

We sorted and separated and our donate pile quickly grew from a few trash bags to over twenty bags.  What helped me the most, Megan removed every last bag from my house that very same day so there was no opportunity for me to go back into those bags and second guess my decisions.  It also removed the burden of me taking all of those items to donate.  Side note: Megan ended up posting these items on a  local Facebook page where people offer their gently used items for free.  People came to her garage and picked through items they could use.  It's a good feeling to know that these items were recycled back into the environment to others that could use them.  

Vivid Hue Home Donations

Vivid Hue Home Donations Grow 

With the excess clothing and accessories out of the way we were able to assess what was left to be organized.  That same afternoon, we sorted my remaining clothes by type: dress shirts, skirts, pants, dresses and more.   Here's an idea of how much cleaning things were already appearing.  


Before: Vivid Hue Home View of Dresser Drawers In Closett

Before: Vivid Hue Home's Jewelry

In Progress: After Initial Sorting Through Keep + Donate Piles

This purging process alone was therapeutic.  And it got my creative juices flowing.  Suddenly, I not only envisioned a neat and organized closet, but one with style and panache

That evening, I started to brainstorm how I could turn my closet into a more feminine closet boutique.  I don't share this space with anyone else and I became focsed on transforming this closet into a colorful space that would match the rest of my colorful home.  

Vivid Hue Home's Closet Renovation 2021

I needed to do this makeover on a dime and I desired to execute it quickly so I wouldn't derail my main goal: having a fresh and organized closet.  I spent the next several days scouring the internet for sources and deciding upon my design direction.  I changed my mind a few times, but there were a few discoveries that solidified my directly pretty quickly; the rug, the paper and the lighting.  

I picked  Target's Opalhouse Speckled Dot Peel and Stick Wallpaper In Gold for the ease of applying it to my wall and it's quick delivery to my home.  

  I fell In love with the colorful chinoiserie rug designed by the boys from Madcap Cottage  called the Moment Embrace Adventure Rug because of it's style and also the feminine colors. 

And then, are you ready for this?  I nearly died when I discovered the Lotus Flower Ceiling Pendant In Powder Blue.  These were on back order for several months but I thought the style was so unique that I decided to purchase two of them and they would be worth the wait. 

 With all of these fun colors, I new my closet would be transformed.  And yet something still seemed lacking.  I went back and forth contemplating whether or not to paint my built In dresser drawers.  It would open a can of worms to paint the dresser.  Would I have to paint the shelves on the side of the closet, too?  What if the end result looked cheap?  And what about the resale value of my house, would this deter future buyers?  (In the end, the future buyers are going to have a lot more to overcome In my house if they don't like colors and patterns because I have truly turned my home into a colorful space).  


Vivid Hue Home's Guest Bedroom. Photo Credit Christine Petit


Next, I will continue my closet renovation journey and reveal the color I decided to paint the closet dresser drawers.  Come back soon to continue reading about the closet makeover.  

Best, 
Heather 


Saturday, 30 July 2016

VHH Master Bedroom Project


It's rare that I find a block of time to sit down, start a post and actually finish it.  This Saturday morning, I'm going to attempt to catch up on as much as possible before the kids beckon my attention.

(Their latest fascination is with professional wrestling and WWE wrestler John Cena 
They simulate wrestling matches and chant Cena's theme song "You Caint See ME, tha time is NOW"...."


This started out as funny; however it has gotten progressively more annoying.  Especially when their play wrestling escalates into a full on brawl...then I attempt to separate them and give them each a time out and they look at me with this face and say "you can't seeeeee me, you can't seeee me."


But I digress.

Most of ya'll that follow me on instagram manage to stay up to date with projects and happenings that I'm working on.  I post there daily and it's so simple.   But I think it's important that I maintain a connection with the rest of my Vivid Hue Homies through this blog.  And so, I promise that I will still post about projects and events here as well.

With that said,  one of my current personal projects at home is updating my master bedroom.  Here is a current photo of the room.  Don't get me wrong, overall, I love the room and I have put quite a bit of work into it already.  But I have always wanted the bedding to be a bit more upscale and better tied into the other elements of the room.  Much of the furniture is custom or made to order and I feel like the bedding has always been an "after thought."


There are a few caveats that I have needed to consider.  The curtains, fireplace chairs, dressers and X benches were all part of our initial investment into the room.  They are not old enough for me to replace and we made an investment into these items, so I needed as many of them to remain as possible.  (I'm not wanting to do an entire room make over).


So I had yellow, gray and teal to work with as my colors (Of course with pops of other colors but I considered these colors not as permanent).


One day I was in the @vividhuehome shop perusing through the Cotton & Quill textiles that we often turn into pillows and upholstery for our customers when I had an ah-ha moment.

The Cotton & Quill Deco Collection had a swatch called The Charleston with all of my necessary color ways.


So I took the swatch home to try it: 


And I absolutely love it.  I'm currently having Cotton & Quill make the duvet for me in the sateen finish.  The front will be the Charleston print and the back will be the yellow candlestick print.  

And now everything else seems to be falling into place: 


Stay tuned for the finished result.  I will post more as it progresses.  

I'm starting to hear the Cena theme song and one kid has the other pinned to the ground for three seconds while the other is shouting "you can't see me!  you can't seeeee me."  So I'm off to refer that project for now.  Until next time!

Take a tour of other rooms in our house here.

xoxox
Heather 


SaveSaveSaveSave

Tuesday, 9 February 2016

DIY Crafty Lighting: VHH on Better CT


You may recall that I worked with Melissa Cole from the Better Connecticut TV show in the fall to produce a few holiday related segments:

Thanksgiving Decor Tips  | November 13, 2015

Holiday Centerpiece DIY  | December 14, 2015


I was thrilled when Melissa contacted me recently to film additional segments for the show.  They already had many Valentine's related gift ideas (you can see my Vivid Hue Home ideas here) and wanted something with a DIY flair.   Since many of the schools in our area have February vacation (next week), I thought it may be helpful to provide a craft that is easy and fun for parents and kids.

Today, the segment "Crafty Lighting" aired.

I demonstrated how to create a yarn lamp shade with some easy supplies.

1. Yarn
2. Shade
3. Lamp Base or Pendant Swag

Here are some behind the scenes photos from the shoot:

Melissa Cole, a reporter from Better Connecticut filming the segment with me.


The first shade I made is on the left the Neapolitan multi-colored one.  You can see that there is a Moroccan tile pattern underneath, but I almost think this adds to the charm.

I love the gray and neon yellow shade.  The yarn was already multi-colored so the pattern automatically developed that way by simply wrapping the yarn around.


I used two different weights of teal fabric to create this look.  It's simple but there's a subtle pattern that adds some texture and dimension.  This is mindless and relaxing to create but I did count the rows per each yarn type to create some symmetry.  


This would look adorable in a little boy's room on the nightstand.


Our pre-spring decor in the shop incorporates fun pops of neon.  I fell in love with these candle sticks at a vendor show.  They're almost so over the top in their color that they are magnificent!  


These love letters were created by just wrapping yarn around and around.  It can get a bit tricky around the edges but just keep layering the yarn and it all works out.  


Thank you to Melissa and the Channel 3 Better Connecticut team that continue to ask me back!  Next week, stay tuned as I give advice on how to zhush up your living room to fight the dol drums of the winter blahs!


Keep in mind, we have some terrific gift ideas for all occasions, particularly Valentine's Day. 

Cheers 
Heather 

Vivid Hue Home + Gifts
775 Farmington Ave | Farmington CT  06032
860-677-0301 | vividhuehome.com
Hours: Mon Closed, Tues + Wed 10-5pm, Thurs 10-6pm, Fri 10-5pm Sat + Sun 10-4pm


Friday, 1 January 2016

DIY: How to Make a Holiday Fruit Tree

I grew up in Northern Virginia and every year around the holidays, my mom would pull out this foreign looking wooden form with nails protruding from it.  I knew exactly what it was for...our annual Colonial Williamsburg style Apple Tree!  She used it as a centerpiece on our Christmas table and as an accent decoration for an entry table.  It always sparked great curiosity and many fabulous comments.  As I grew into an adult, I decided to carry on the same tradition.  


To start you'll need the following:  

1. Apple Cone Form

2. Pineapple
3. 3-4 bags of delicious red apples (or in this case oranges).  


4. Greenery


5. Whole Cloves (if using oranges)


Assembling the Tree


I start by adding oranges or apples from the base of the tree to the top.  It doesn't matter if you put the fruit in rows or staggered, but I would stick to the same pattern throughout.  


Stick the pineapple on the very top of the base.  There will be wholes between the fruit that you will fill in with fresh greenery.  I use anything from boxwood to holly.  

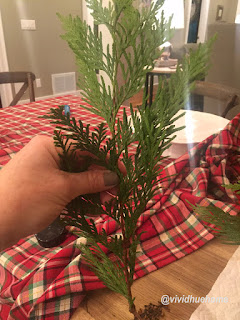
Fill in the bare sections with strips of greenery.  I usually stick the end of the branch towards the bottom and let the leafy tops of the greenery fill in between the fruit.  It can be unruly so you will have to push it between the fruit in places so the fruit can still be seen.  


I added cloves to a few select oranges after the fact.  If i'd had more patience, I would have consistently put them in each and every orange.  


I added some faux berries in between the greenery to add an additional amount of color.  I also used some pink and red ornaments around the base to make the centerpiece seem more Christmas-y.  


The Christmas season was here and gone in a flash and I didn't have time to post this tutorial before Christmas.

I also had the wonderful opportunity of sharing this DIY project on Better Connecticut in early December.  Melissa Cole came to the shop and taped the segment.


Check out the link to the show here

Hope you all enjoyed your holiday season.  Welcome to 2016.
Cheers,

Heather


Thursday, 19 November 2015

How to "Build" Garland


Recently I posted a photo on Instagram displaying my stairway garland.  A few of ya'll wanted to know how to recreate it and I gave a brief description about how I use multiple layers to "build" it.

Today, I'm going to provide more details into my garland process.

The finishing result produces thick glorious garland full of pine cones, berries, lights, leaves and greenery.


The fact that I already have my garland hanging and it's only mid-November should be a tell tell sign that I don't use fresh greenery on the stairs.  My rationale is that it's such a heavily trafficked area so artificial greenery can withstand the traffic and hold up over time.  Plus, I'm able to get a jump start on my seasonal decorations and I know they will last the entire holiday season.

Supplies Needed: 

Here are the ingredients that I use when "building" my garland.  I say BUILD because it truly is a layering and adding process.  (But very simple).  

1. Higher Grade Garland
2. Layering "Roped" Garland with Berries
3. Sprigs and Fillers
4. Lights
5. Garland Ties
6. Extension Cords

1. Select a higher quality garland from your local craft store.  

It should include real pinecones, life-like berries and a few extras such as twigs.  Anything that further enhances the "real" appearance.  It usually retails for $40-100 (but it is ALWAYS 50% off, so you should expect to pay $18-30 per strand.   I used Michael's Celebrate It Winter Naturals $18.


2.  Select a decorative strand of "wrapping" garland.  


By this, I mean the ropes that contain holly and berries.  Or just berries that are strung together.   These ropes are usually located in a separate section away from the greenery.
I found ropes of small berries from Michael's (not pictured here but very similar to the holly with faux berries as seen in this photo).  Again, it is ALWAYS 50% off and will likely run around $7 per rope.


3.  Select fillers and sprigs

This aisle in any craft store is usually the most daunting.  In it's entirety, it's easy to dismiss this aisle as a bunch of tacky and elaborate bins filled with gawdy decorations.  Take time to hone in on each individual bin and picture each sprig on it's own.

Look for life like berries that can be added into your garland.  I always go for the berries that do not have any dazzle, meaning no sparkle or glitter falling off of them.   I try to pick things that look like they could be found in nature.


5. Select Lights

I use white lights.  Make sure they can connect multiple strands together.  The craft stores usually have them discounted and a package of 100 will usually cost around $6.  I always purchase more than I think I will use...and I always need more than I have purchased! 


6.  Garland 

Garland Ties are my LIFESAVER!  They make the job so much easier and are a must.  I use the plastic ties from Lowes (Holiday Living 10-pack Plastic Garland Ties $3.99).  


7. Extension Cords

I usually use one cord at the bottom of the stairs and one at the top for obvious reasons, to plug in the lights! 

Process for Building Garland: 

I wish I had photos of the actual layering process but I didn't capture those.  Still, once you have all of the ingredients, building the garland becomes simple.  

1.  Start with the "higher quality" garland and use the garland ties to affix to the railing.  A few tips: I usually start at the top of the stairs and work down.  I do NOT waste time wrapping the garland in between all of the individual posts.  I line the garland on the top part of the banister and tie the garland ties every 3-4 feet to hold it in place.  (This is the only time I use the garland ties).  

2.  Drape the roped berries on top of the greenery.  Tips: Start at the top of the stairs and work down.   Do not simply lie directly on top.  Attempt to make it appear natural with a "s" shape formation over the greenery garland.  

3. Add Lights.  Determine where the most logical location will be to plug in your lights.  For example, i have an outlet at the bottom of the stairs that is hidden behind a dresser.  My outlet at the top of the stairs is around a corner in the hallway.  Because of this, I wanted my "plug in" location to be at the bottom of the stairs where it will be hidden.  Determine your "start" location accordingly.  (For example, I begin at the top of the stairs so the plug will end up at the bottom).  

 I used to meticulously wrap the lights around the banister between each stair post.  Now, I drape the lights over the top of the greenery in an "S" shape and use the wire from the greenery to "hold" the lights in place.  (Wrap a few of the twigs over the light cord to secure in place).  


4. Add Fillers.  Take the sprigs of berries and pine cones and plug into parts of the garland that appear bare.  You may find that you don't need many fillers by this point.  

5. Ribbon.  I do not add ribbon to my stair banisters but it certainly adds another dimension.  


I find that the end result of this process brings a beautiful and custom appearance.  Of course, the same can be done with fresh greenery!   

Now, I have to resist the temptation to turn on the lights until after Thanksgiving.  It's nice to get a jump start on the decorating, but I have to pretend that we're still singing pumpkins and gourds at our house until December!  

To check out some of Vivid Hue Home's previous Christmas decor, look here:


Check out my live decorating updates on Instagram


Related Posts Plugin for WordPress, Blogger...